ChatGPT Business Listing: How to List Your Business in ChatGPT
A ChatGPT business listing is a verified profile in OpenAI's Business Hub. Here is the 17-step setup, with screenshots, from the first click to identity verification.
A ChatGPT business listing is a verified business profile you create in OpenAI's Business Hub at chatgpt.com/business-hub. You add your website, prove you own it, describe what you sell, set your delivery and return terms, and confirm the account owner's identity with a government-issued ID. It takes about 10 minutes, it is free, and it works on a free ChatGPT account.
We set one up for an ecommerce client and wrote down every click. This guide is that checklist, with the screenshots, so you can build your own ChatGPT business listing without guessing which button comes next. The business name and website in the screenshots are placeholders. Everything else is what we saw on screen on 11 November 2026.
Key takeaways
- You build the listing at
chatgpt.com/business-hubwhile signed in to the business owner's ChatGPT account. That account becomes the profile's owner. - You have to prove you own your website. Shopify stores can do it in one click. Every other platform uses a DNS TXT record.
- Your delivery and return choices are repeated to shoppers, so match them to the policies already published on your website.
- The profile starts as a draft. You cannot edit it or publish its business agent until the account owner verifies their identity with a government-issued ID.
- Setup takes about 10 minutes and costs nothing. OpenAI changes the flow from time to time, so button names may differ slightly from the screenshots.
What a ChatGPT business listing is, and why set one up
Shoppers now ask ChatGPT questions like "where can I buy this?" or "who ships this to me?" A business profile in the Business Hub gives ChatGPT verified facts to work with: your store, your website, your delivery terms and your return window. Without one, ChatGPT has to piece those details together from whatever it can find on the open web.
A listing is not the same thing as ranking in AI search. It is one piece of it. The other pieces are crawlable pages, a clear site and mentions on other sites, which we cover in our guide on how to be found on ChatGPT and AI-powered search platforms. Think of the listing as the part where you hand ChatGPT accurate facts about your business instead of hoping it finds them.
Before you start
Have these five things ready. The last one catches people out, because you need it at the very end.
- A ChatGPT account you are signed in to at chatgpt.com. Use the business owner's account. It becomes the profile's owner.
- Your website address, exactly as customers type it.
- One way to prove you own the site. Either the Shopify store owner login, or access to your domain's DNS settings.
- Your delivery and return terms. Know whether delivery is paid or free, and how many days customers have to return items.
- A government-issued photo ID for the account owner. You need it at the end, before the profile can be edited or published.
Part 1: Start the profile
Step 1: Open the Business Hub
Go to chatgpt.com/business-hub while signed in to ChatGPT. Continuing from here accepts OpenAI's Businesses in ChatGPT Terms, which are linked at the bottom of the page.
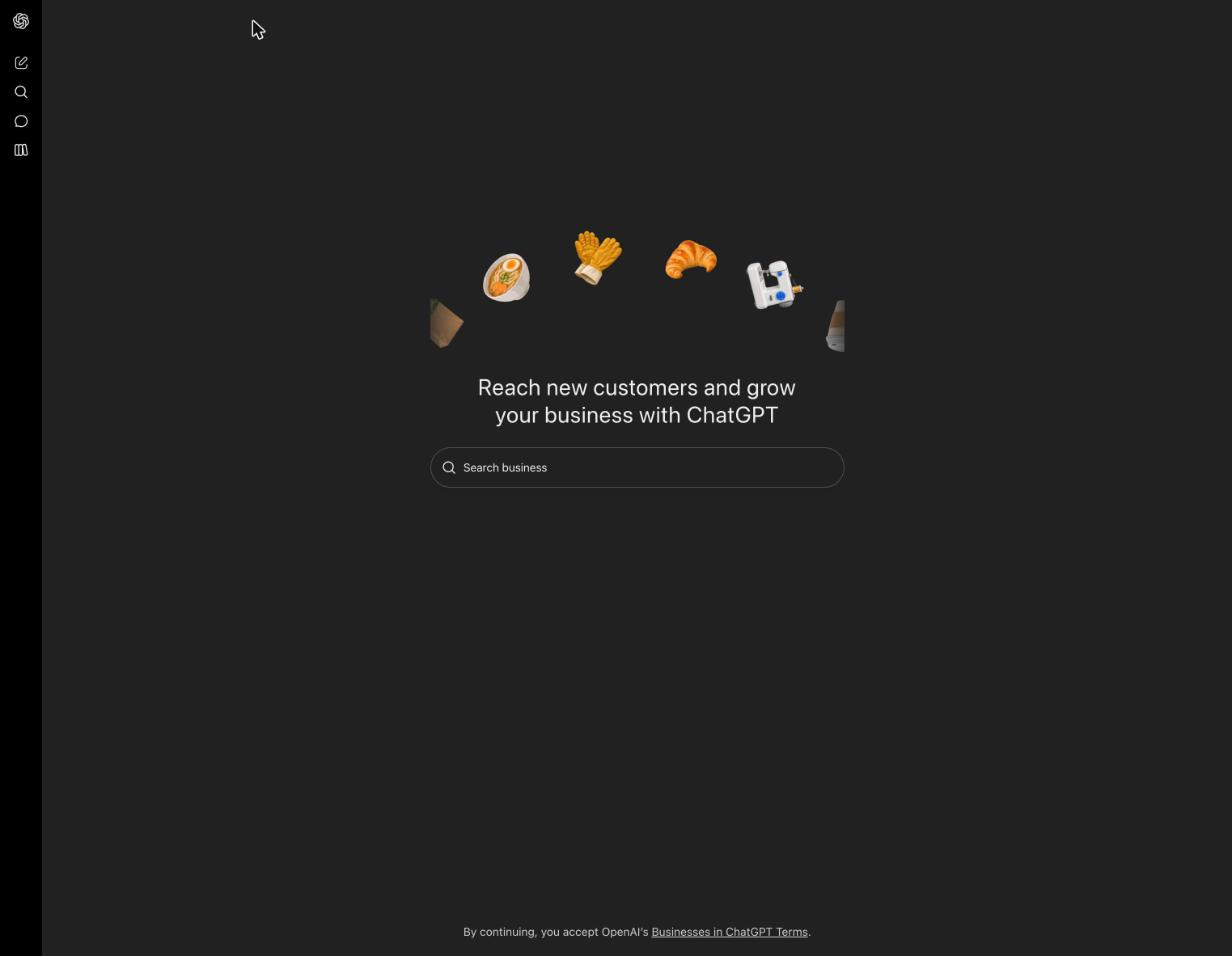
Step 2: Search for your business name
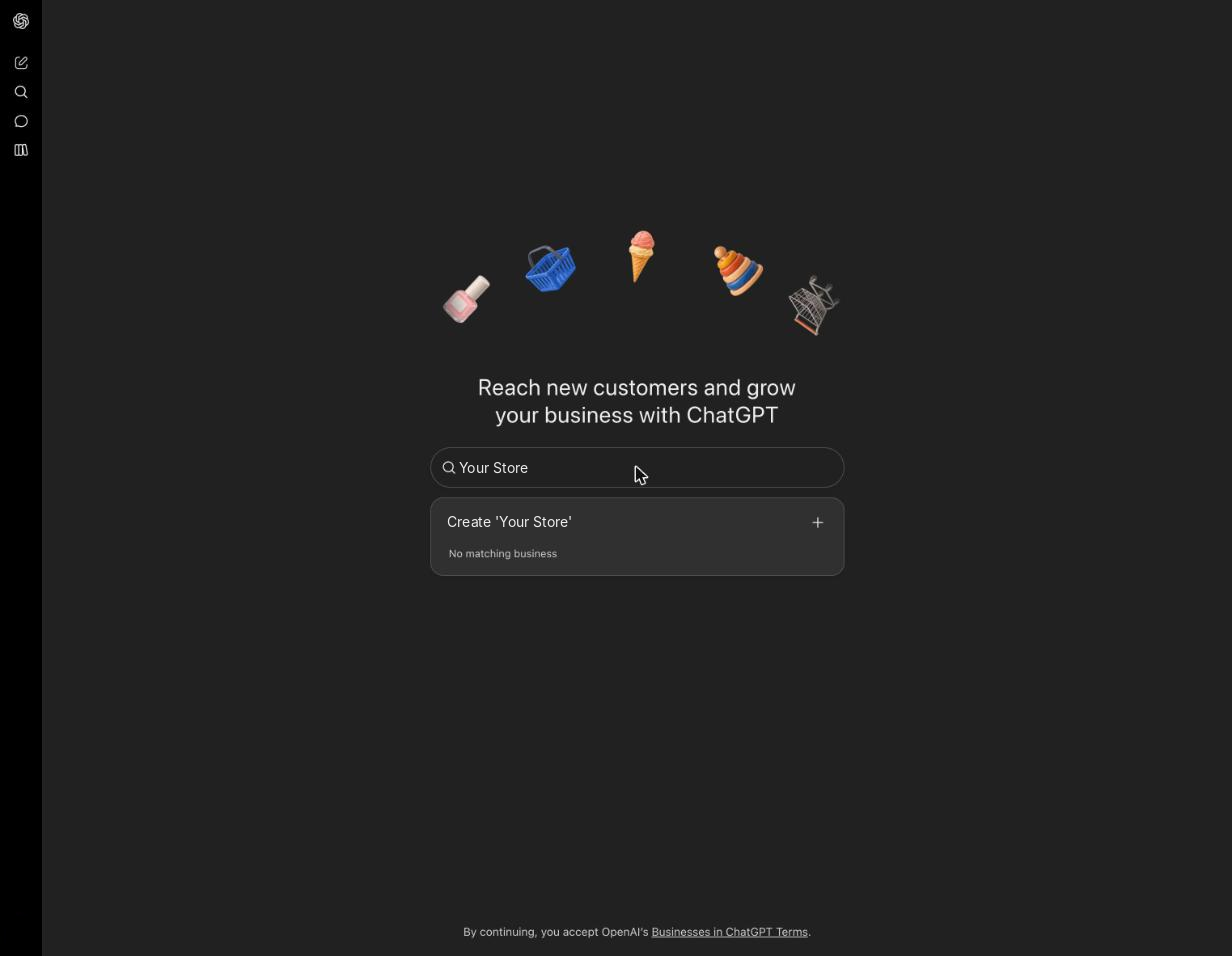
Type your business name into Search business. If your business is already listed, select it and claim it. If you see No matching business, click Create 'your name'.
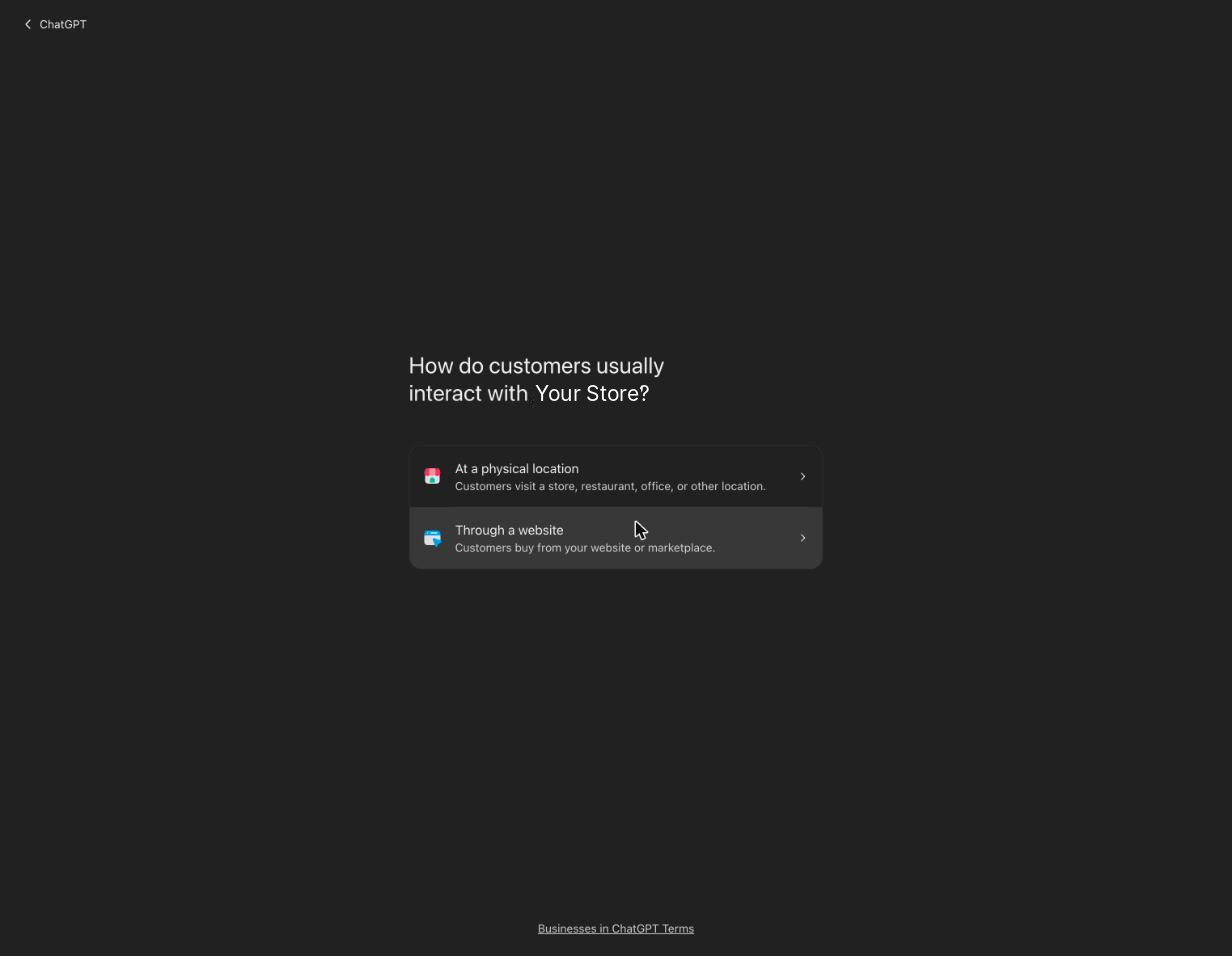
Step 3: Choose how customers buy from you
Online shops pick Through a website. Shops, restaurants and offices that customers visit pick At a physical location. The rest of this guide follows the website path.
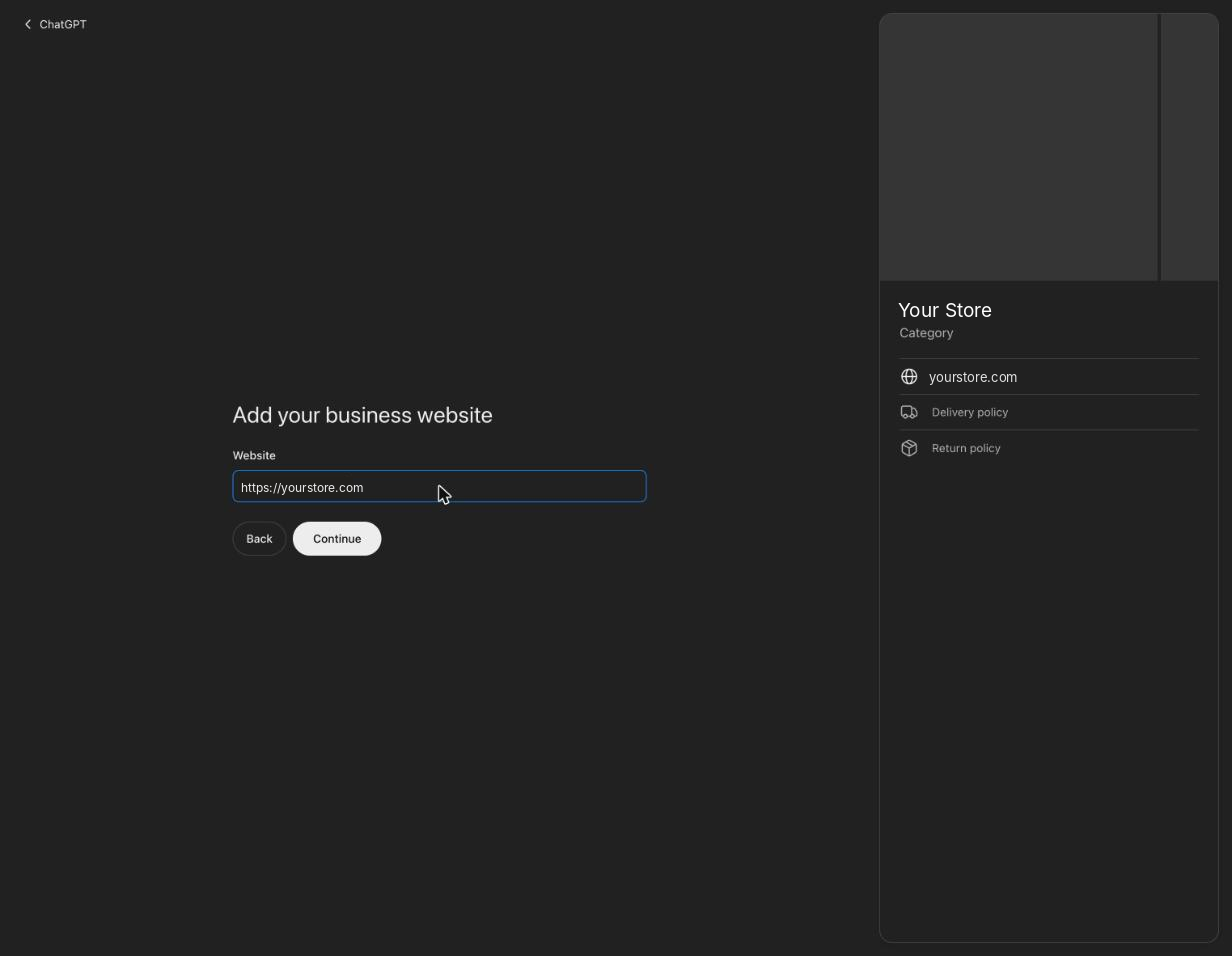
Step 4: Enter your website
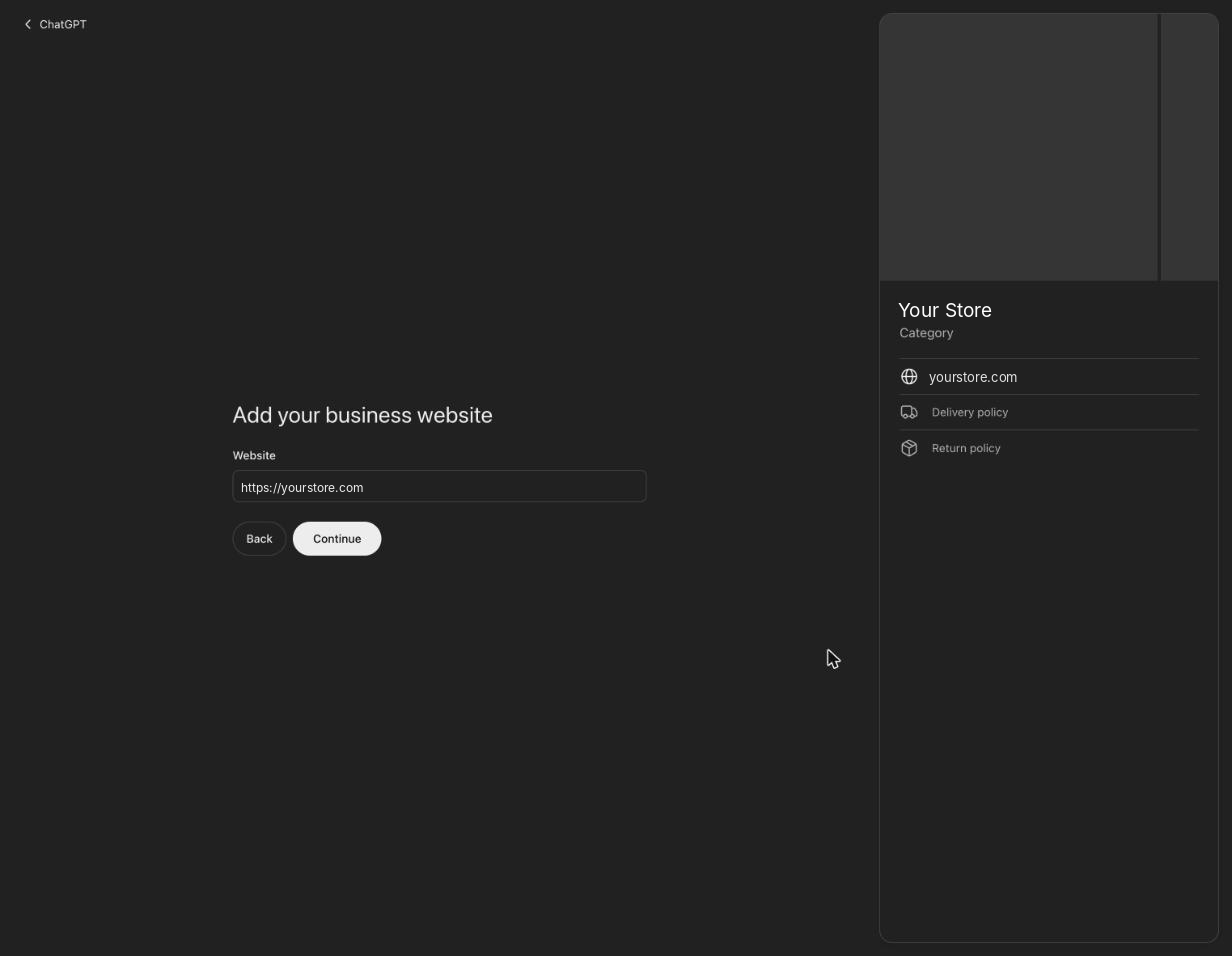
Type the full address, including https://, then click Continue. The preview card on the right fills in as you go. It shows what shoppers will see.
Part 2: Verify you own the website
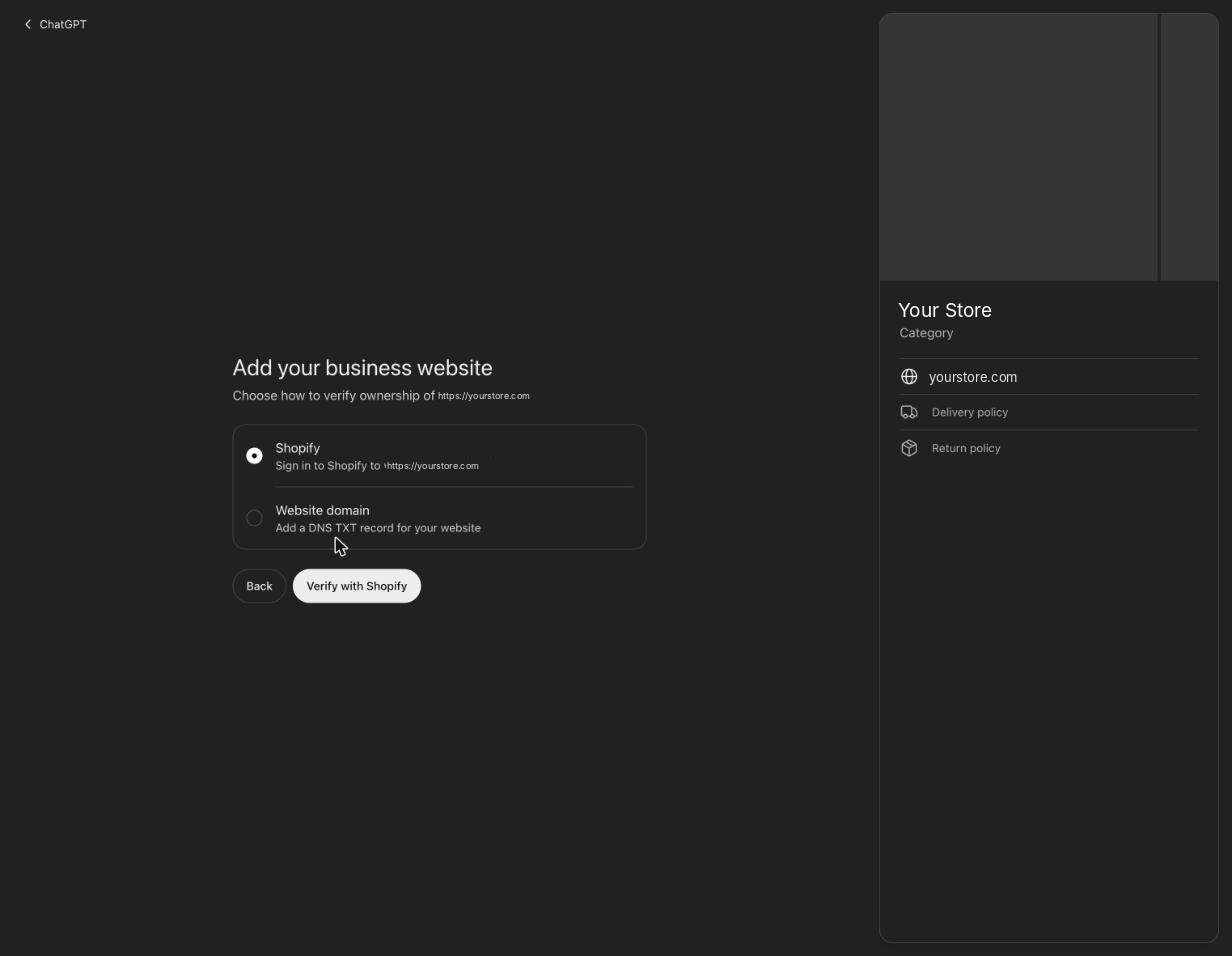
Step 5: Pick a verification method
Shopify stores can choose Shopify and click Verify with Shopify. The next three steps follow that route. On any other platform, choose Website domain and follow the DNS steps in the "Not on Shopify?" section after step 8.
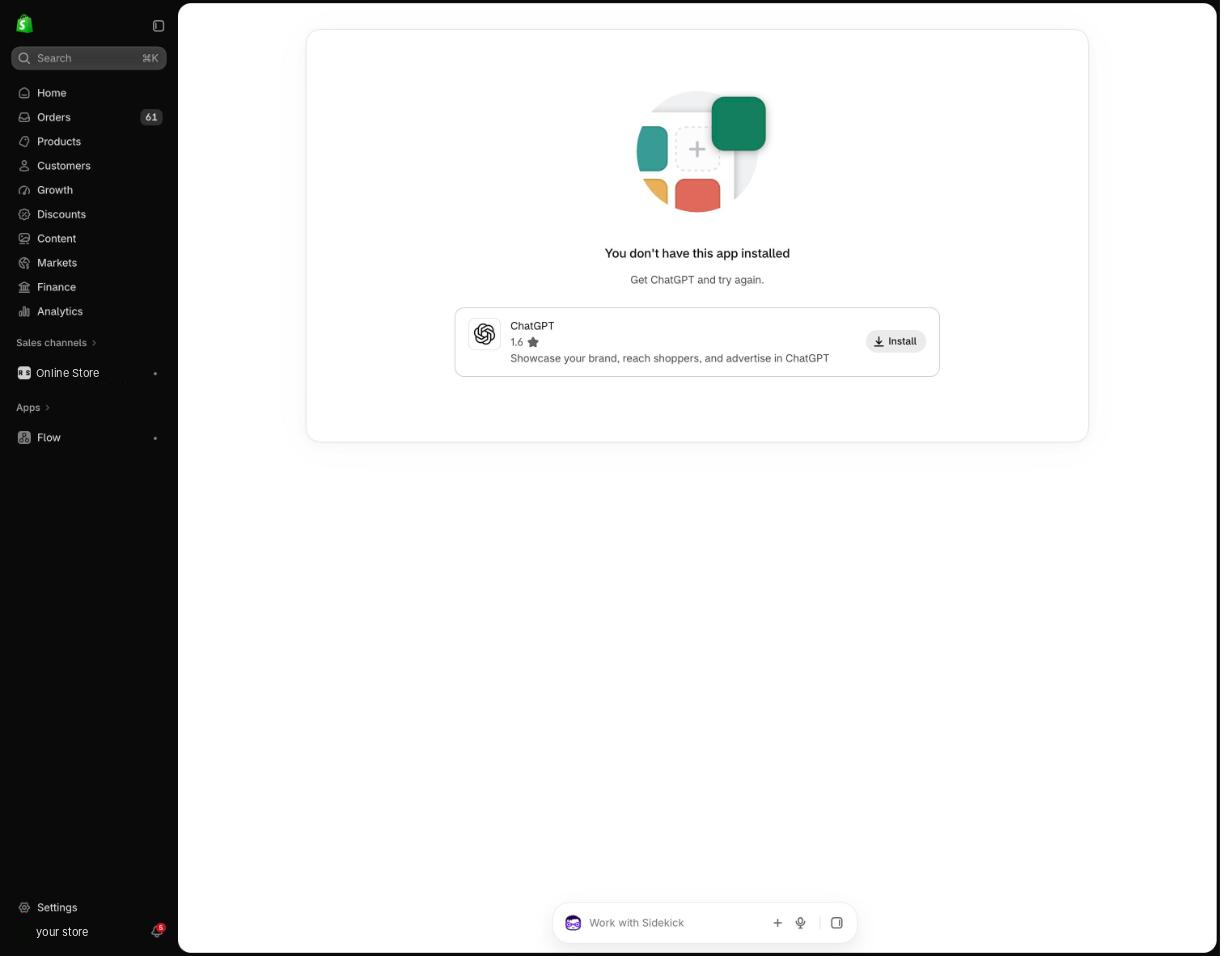
Step 6: Sign in to Shopify and install the ChatGPT app
Sign in to your Shopify admin as the store owner. If the ChatGPT app is not installed yet, Shopify shows You don't have this app installed. Click Install next to ChatGPT.
Step 7: Review the permissions and install
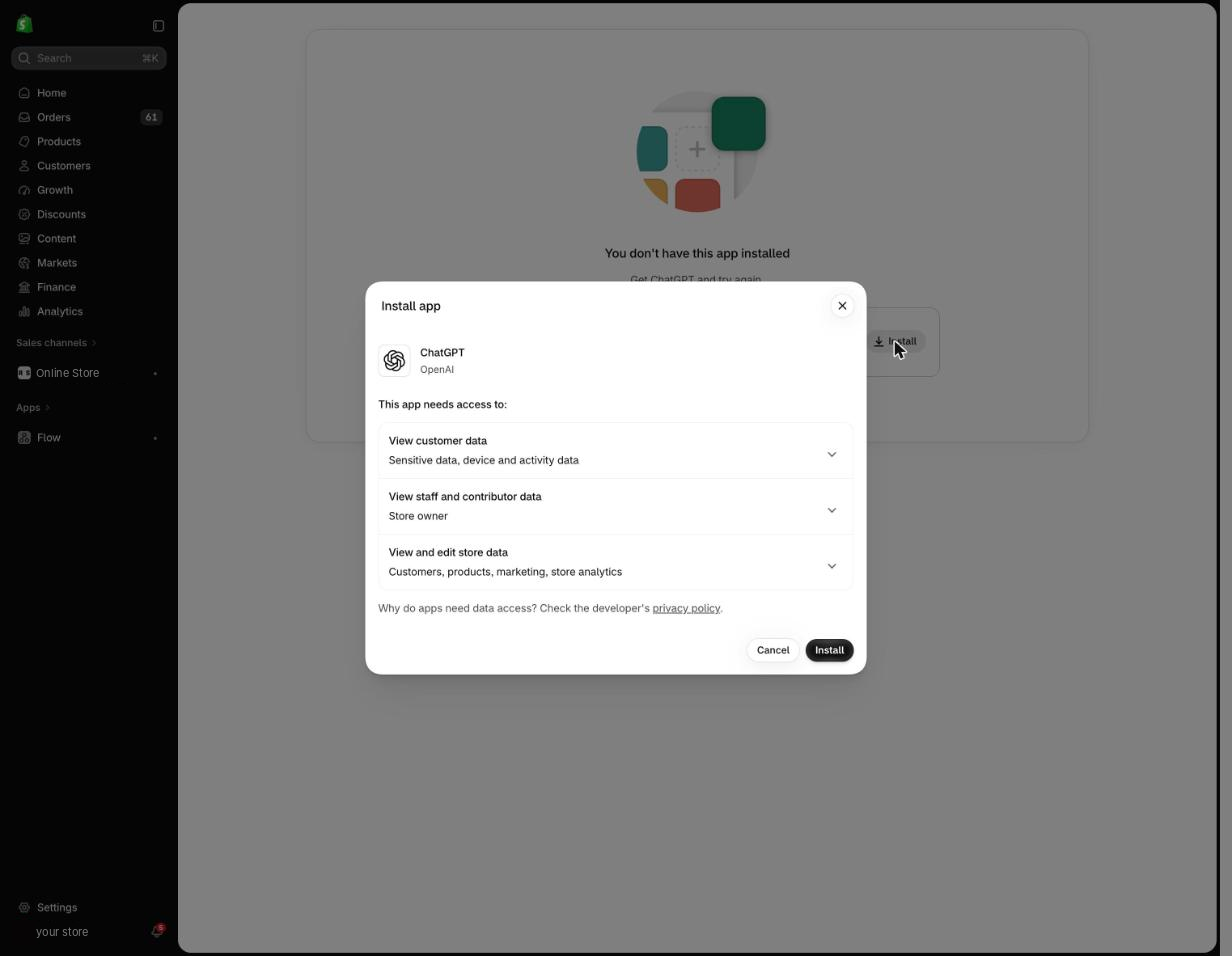
Check that the developer is OpenAI. The app asks to view customer data and staff data, and to view and edit store data such as customers, products, marketing and analytics. Click Install if you accept. If you do not want to give that access, click Cancel and use DNS verification instead.
Only the store owner, or staff with permission to install apps, can do this. You can remove the app later in Shopify under Settings > Apps.
Step 8: Click Continue again
After the install, Shopify sends you back to the website step. Your address is already filled in. Click Continue once more. This time verification goes through and you move on to your business details.
Not on Shopify? Verify with DNS
In step 5, choose Website domain. ChatGPT gives you a TXT record. Add it in your domain provider's DNS settings (GoDaddy, Cloudflare, Namecheap and others) for your root domain, save it, then come back and confirm. DNS changes can take anywhere from a few minutes to a few hours to show up, so if the check fails, wait and try again. This route does not give ChatGPT any access to your store.
Part 3: Describe your business
Step 9: Open the category list
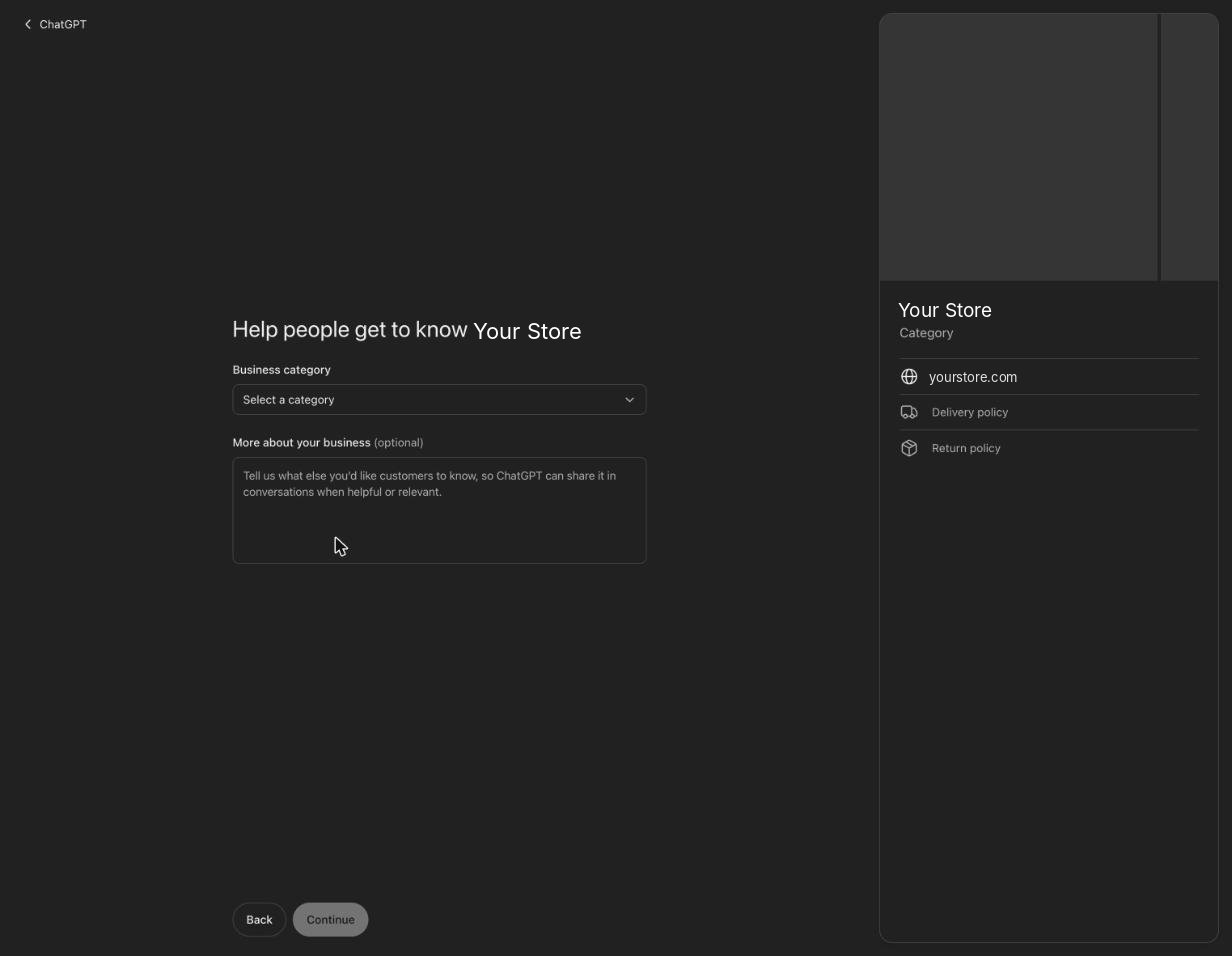
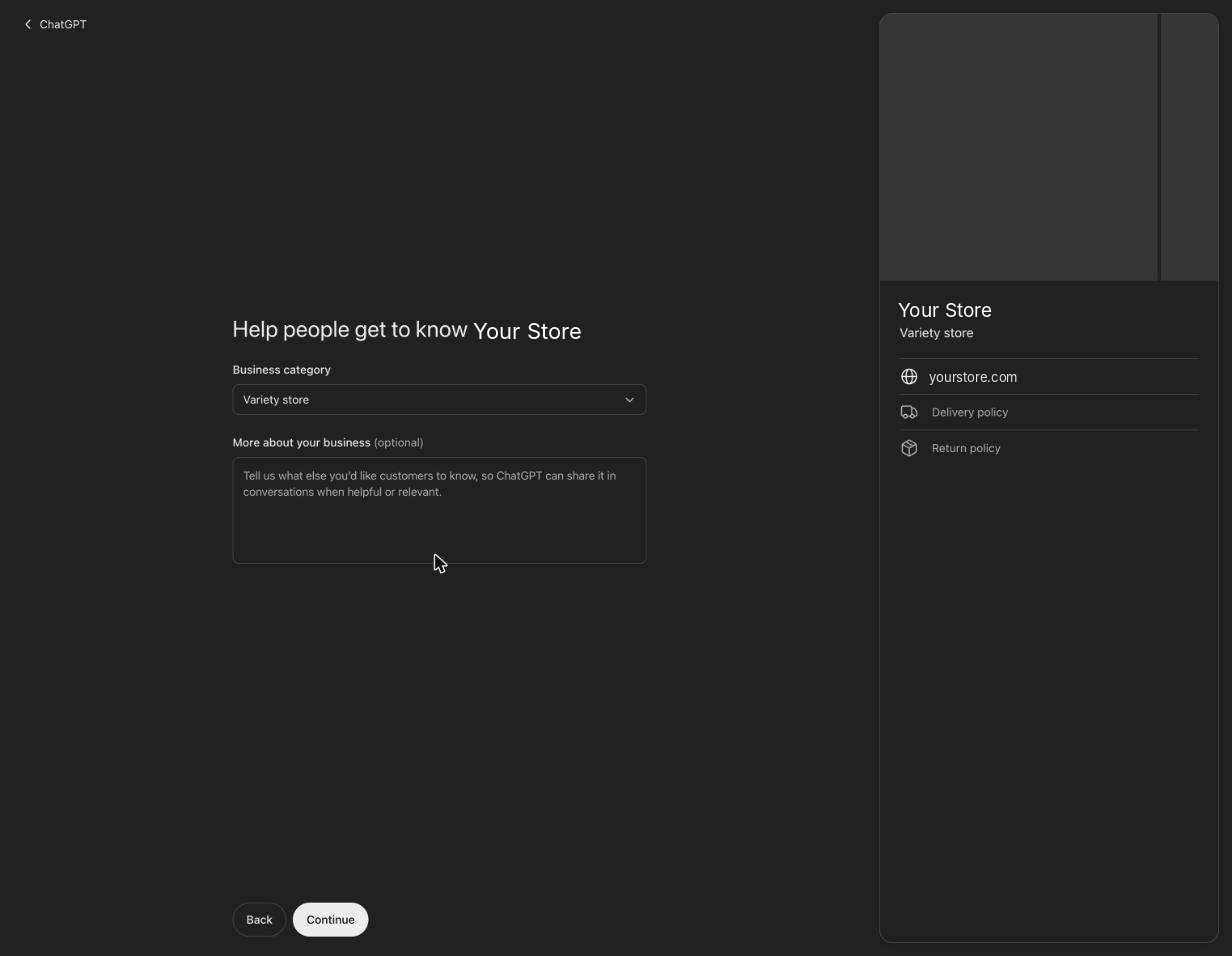
On the Help people get to know your business screen, click Select a category.
Step 10: Search for the closest category
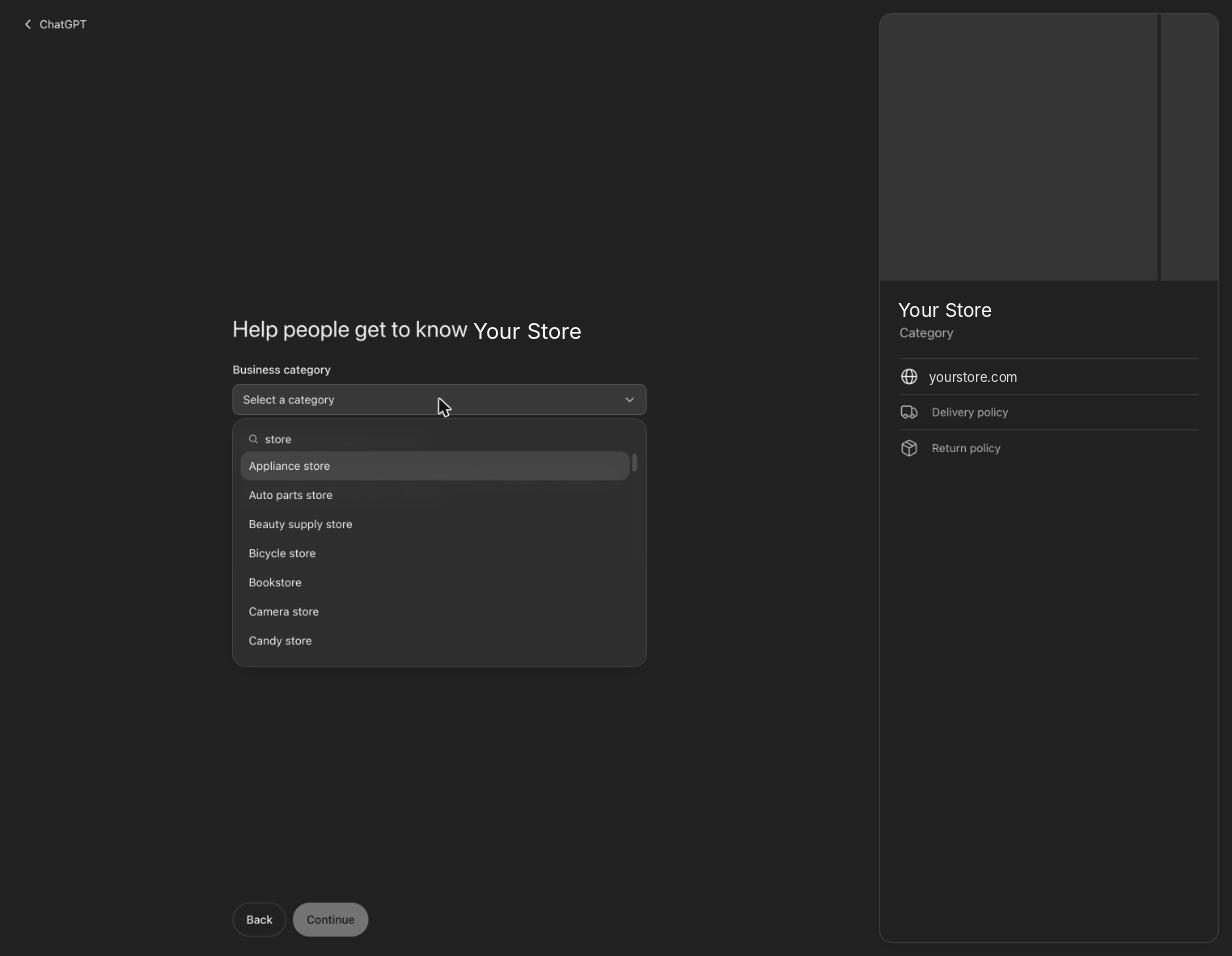
The list is long, so type a word to filter it. Typing "store" lists every kind of shop. Pick the one closest to what most of your customers buy.
Step 11: Add a short description (optional) and continue
The More about your business box is optional, but ChatGPT uses it when it answers customers. Two or three plain sentences about what you sell and where you ship are worth adding. You can also add it later. Click Continue.
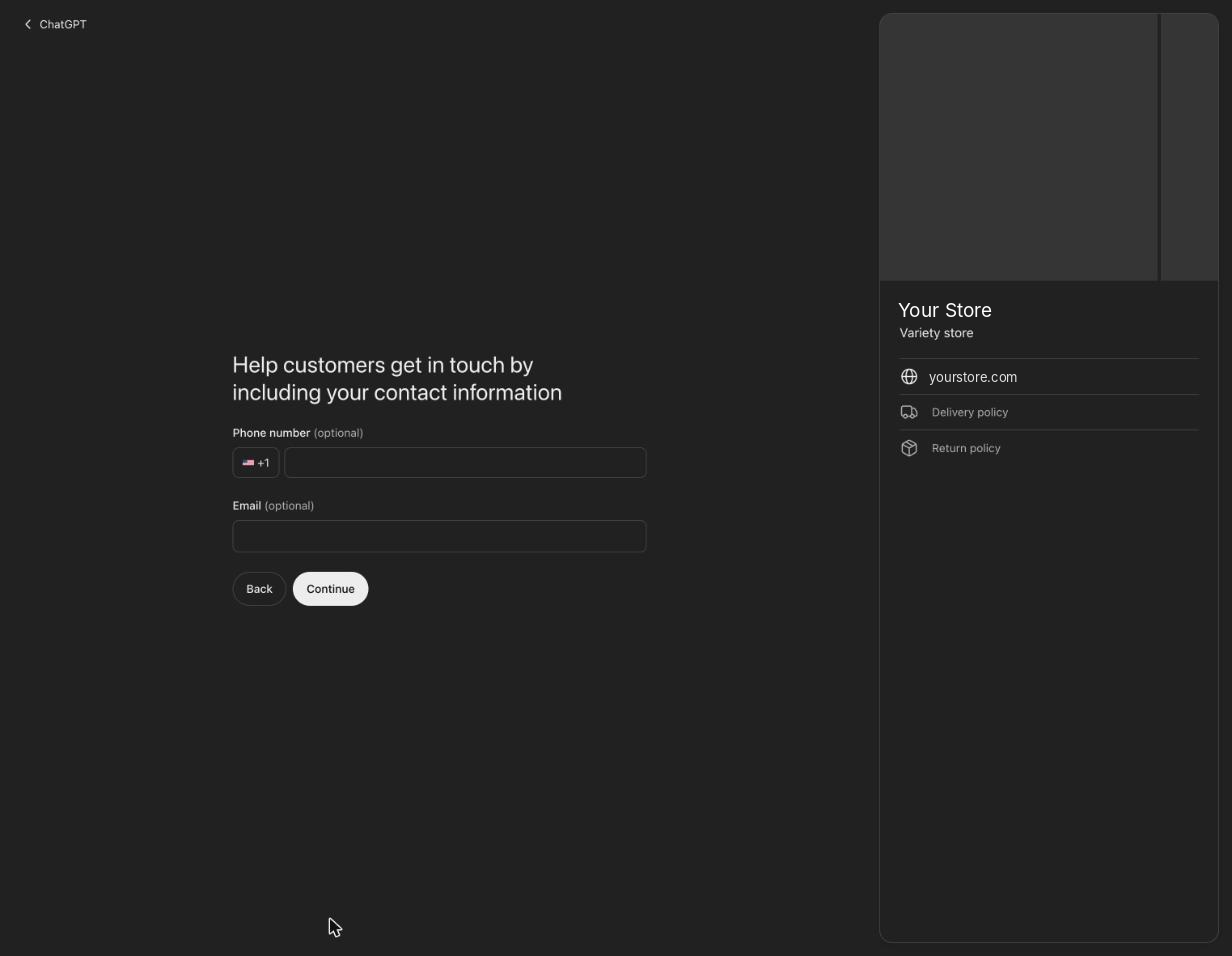
Step 12: Add contact details (optional)
Phone and email are optional, and they are shown to customers. Use your customer-service email, not a personal one. Change the country code if you are not in the US. Click Continue.
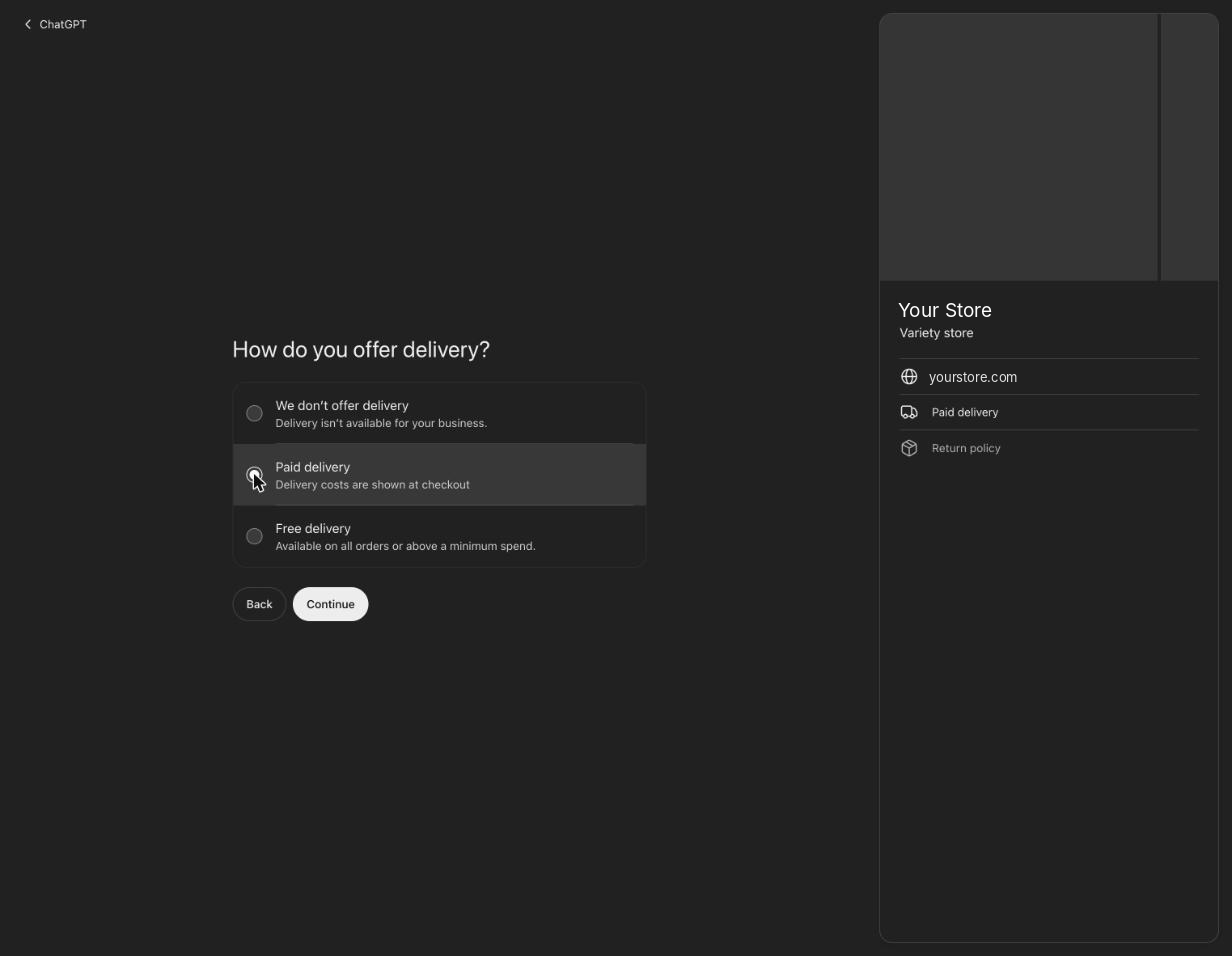
Step 13: Choose your delivery option
Pick Paid delivery if shipping is charged at checkout. Pick Free delivery if it is free on every order or above a minimum spend. Click Continue.
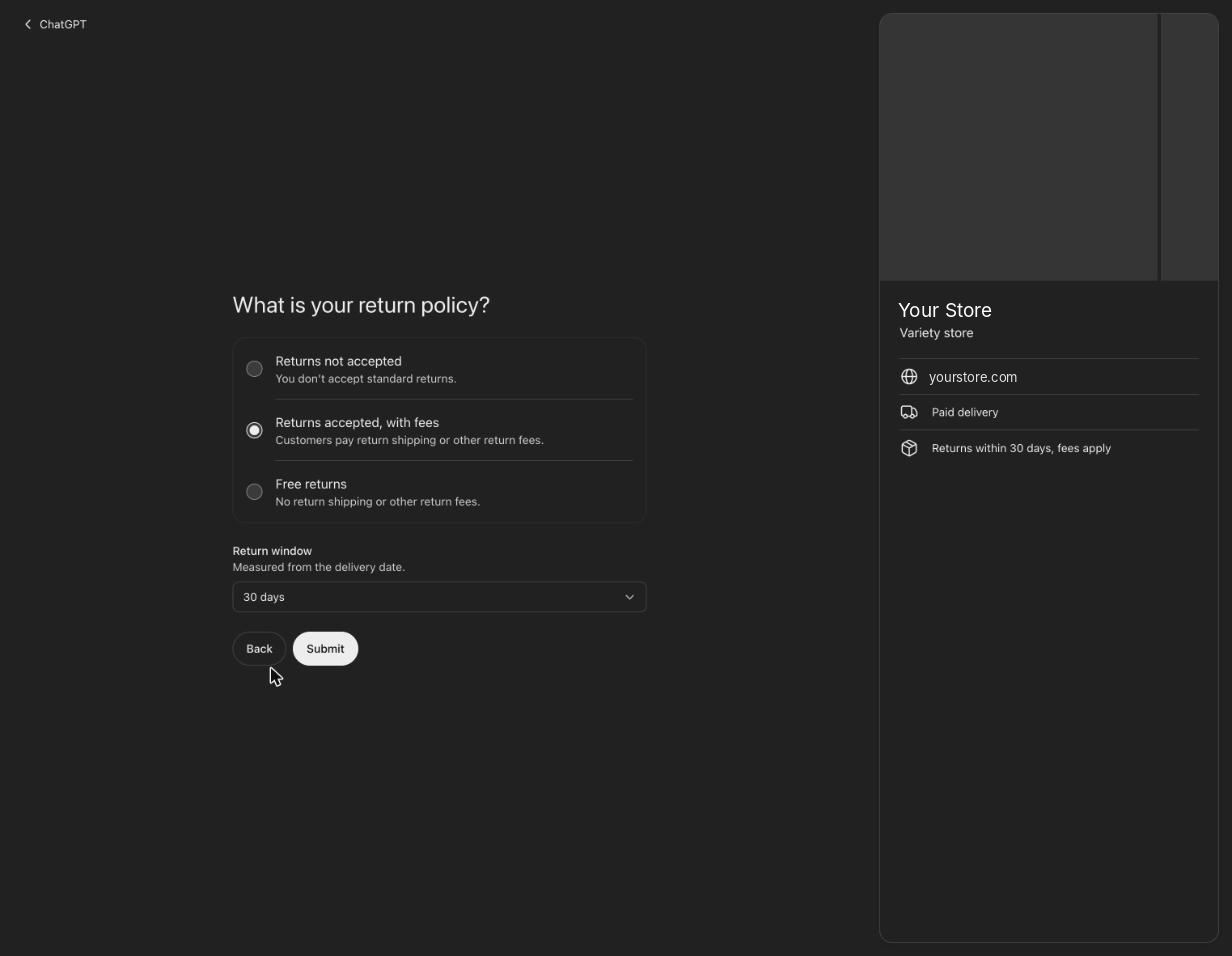
Step 14: Set your return policy and submit
Choose the option that matches your published refund policy. After you choose, a Return window dropdown appears below the options. Set the number of days, then click Submit.
One thing to watch: the return window field appears only after you pick a policy, and it pushes Submit down the page. Make sure the number matches what your website's refund policy says, because ChatGPT repeats it to shoppers.
Part 4: Finish and publish
Step 15: Your profile is created as a draft
You will see a "You've created" message with your business name. The profile is saved as a draft and is not public yet. Click Go to business overview.
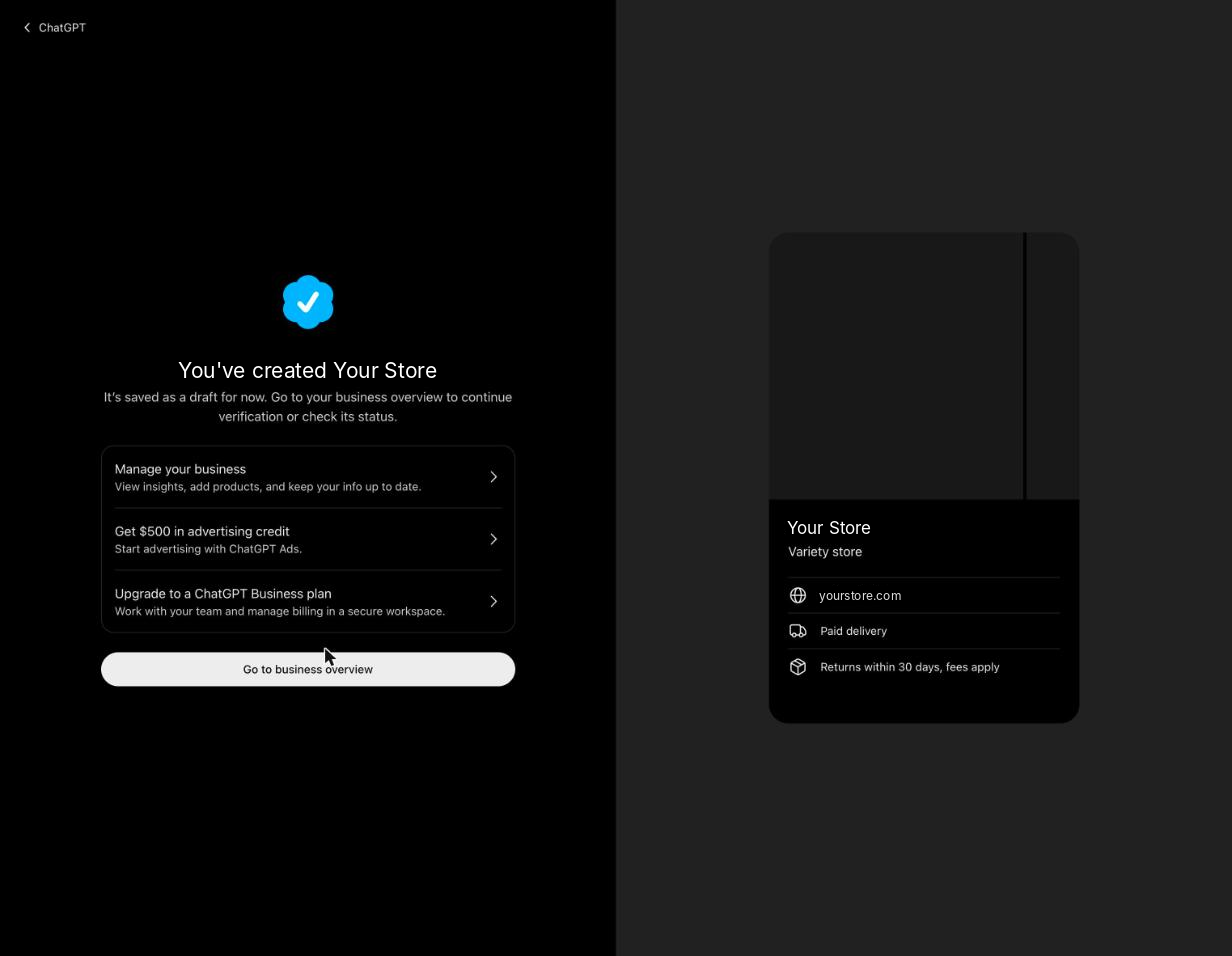
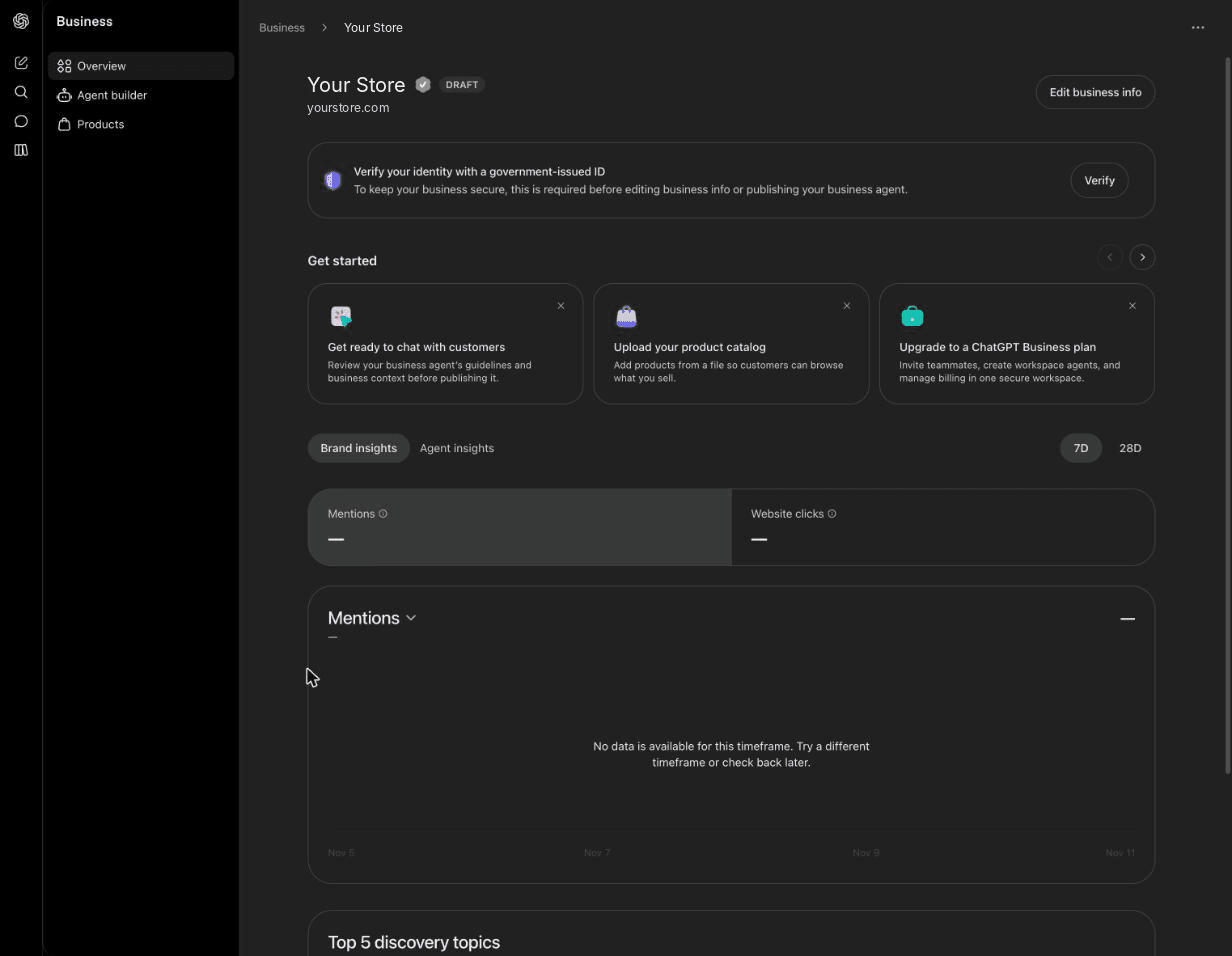
Step 16: Check the business overview
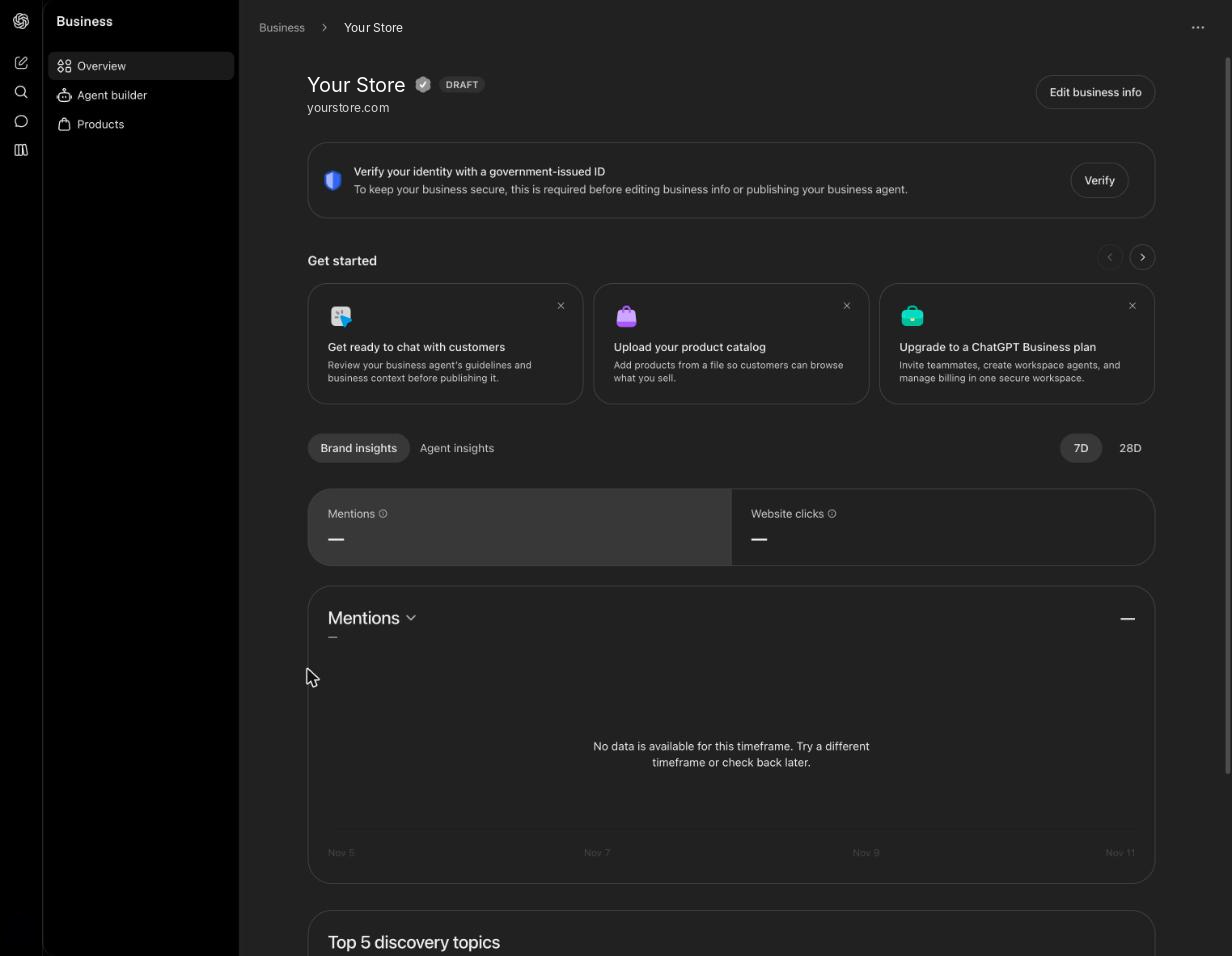
The overview shows your business with a DRAFT badge. It stays a draft, and you cannot edit it or publish its business agent, until the account owner verifies their identity.
Step 17: Click Verify and confirm your ID
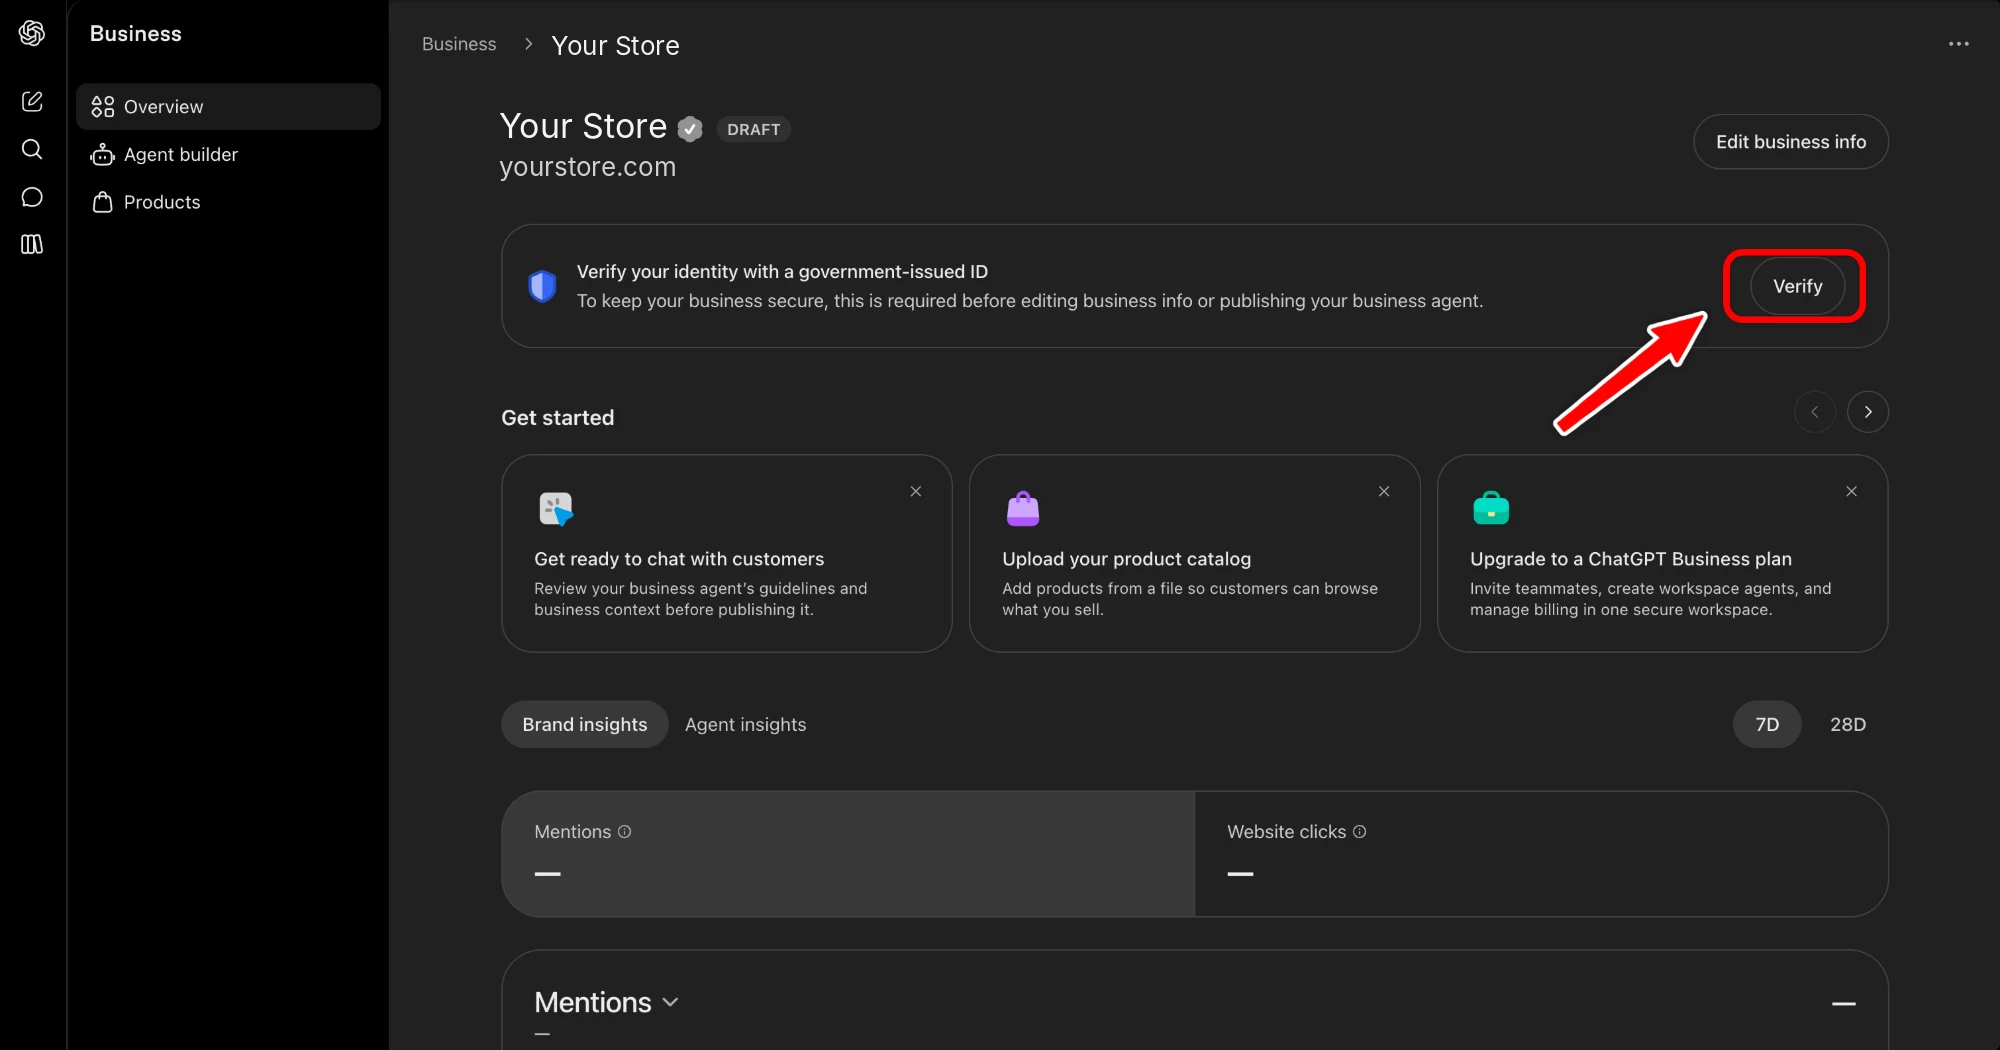
In the Verify your identity with a government-issued ID banner, click Verify. Follow the prompts to photograph your ID. Only the account owner can do this step. When it is approved, the DRAFT badge goes away and you can publish.
After ID verification
- Get ready to chat with customers. Review your business agent's guidelines in Agent builder, then publish it.
- Upload your product catalog under Products so shoppers can browse what you sell.
- Check Brand insights after a week or two. It shows how often ChatGPT mentions you and how many people click through to your site.
How to choose your answers
Most of the setup is picking the option that matches how your business already works. This is the rule we used for each field.
| Field | What to pick | Why |
|---|---|---|
| Interaction | Through a website for online shops. At a physical location if customers visit you. | It decides which setup path you follow. |
| Verification | Shopify if your store runs on Shopify. Website domain for everything else. | Shopify is one click but grants the app store access. DNS grants none. |
| Category | The closest match to what most customers buy. | It tells ChatGPT what kind of business you are. |
| Delivery | Paid delivery if shipping is charged at checkout. Free delivery if it is free on every order or above a minimum spend. | ChatGPT repeats this to shoppers, so it has to match checkout. |
| Returns | The option that matches your published refund policy, plus the exact number of days. | A mismatch with your site's policy creates complaints. |
| Description, phone, email | Add them if you can. They are optional. | ChatGPT uses the description in its answers, and customers see the phone and email. |
FAQ
How much does a ChatGPT business listing cost?
Creating the profile is free, and it works on a free ChatGPT account. The setup screens also mention optional paid extras such as a ChatGPT Business plan and advertising, but you do not need either to create and publish a profile.
How long does it take?
About 10 minutes for the form itself. Identity verification and, if you use DNS, the time your domain provider takes to publish the TXT record come on top of that.
Do I have to use Shopify to verify my website?
No. Shopify stores get a one-click option. Every other site chooses Website domain and adds a TXT record in its DNS settings. The DNS route does not give ChatGPT any access to your store.
Why is my profile still a draft?
New profiles stay in draft until the account owner verifies their identity with a government-issued photo ID. Until then you cannot edit the profile or publish its business agent.
Who needs to do the setup?
The business owner, or someone working with them. The profile belongs to whichever ChatGPT account created it, and only that account owner can complete identity verification. If you are on Shopify, only the store owner or staff with permission to install apps can add the ChatGPT app.
Can I remove the ChatGPT app from Shopify later?
Yes. In Shopify, go to Settings and then Apps and remove it. If you would rather not grant that access at all, cancel the install and verify with DNS instead.
Does a listing guarantee ChatGPT will recommend my business?
No. A listing gives ChatGPT verified facts about your business, but it does not decide when or how often you are mentioned. Brand insights in the overview shows how often ChatGPT mentions you and how many people click through, so you can see what is happening. The rest depends on your site and your reputation, which is the work in our guide to being found on ChatGPT.
If you would rather have someone handle the listing and the SEO behind it, see what our SEO services include, or get in touch. OpenAI changes this flow from time to time, so if a button name here does not match your screen, follow the closest option and check the details against OpenAI's own help pages.